Support Obyte tutorials by making a donation.
Support Obyte tutorials by making a donation.
Scan this code with your Obyte Wallet or click here to open your wallet. Thank you!
A step by step guide to building a basic Node application with Obyte integration for absolute beginners.
By the end of this tutorial, you will have built a browser application that allows a user to post payments, data and data-feeds to the Obyte network.
We will be writing a Node js application using the Express framework with Pug Templating and Bootstrap. For Obyte integration, we will be using Obyte js libraries.
This tutorial assumes no prior knowledge of any of the above. However, you need to have Node and npm installed on your machine.
Before we can start coding, we’ll need to get Node and npm installed on your machine.
To check that Node and npm are installed correctly, open your terminal and type:
node -v
followed by:
npm -v
That will output the version number of each program. At the time of writing, my Node js version is v10.10.0 my npm version is 6.4.1.
Create a new directory for your application, e.g. myObyteApp.
Initialise your new project, by going to your terminal window and typing the following command:
npm init -y
That will create and populate a package.json file in your directory.
Express is a lightweight web application framework for Node.js, which provides a robust set of features for writing web apps. These features include route handling, template engine integration and a middleware framework.
Type following command in the terminal window:
npm install --save express
--save option, adds Express to the dependencies section of the package.json file.
nodemon is a convenience tool. It will watch the files in the directory it was started in, and if it detects any changes, it will automatically restart Node application. Type following command in the terminal window:
npm install --save-dev nodemon
In your application folder create index.js file, then add the following code to it:
const app = require('./startup/app');

const server = app.listen(process.env.PORT || 3000, () => {
  console.log(`Express is running on port ${server.address().port}`);
});
Create startup folder under your application folder and add app.js file to it, then add following code to it:
const express = require('express');
const app = express();

// routers

module.exports = app;
Your application directory should look like this:
myObyteApp
  startup
    app.js
  index.js
  package.json
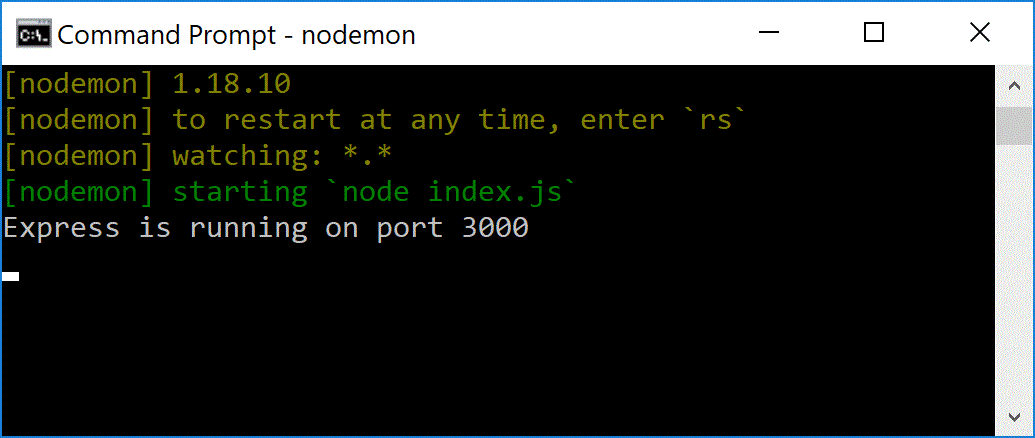
Now, you can start your application by typing the following in the command window:
nodemon
By default, nodemon will look for index.js file. Your server will start on port 3000, and you should see the following message in the command window:
Create a routes folder under your application folder. Add home.js, postDAG.js and searchDAG.js files to the routes folder.
Add the following code to the home.js file:
const express = require('express');
const router = express.Router();

router.get('/', (req, res) => {
  res.send('Home page');
});

module.exports = router;
Add the same code to the postDAG.js and searchDAG.js files, replacing res.send('Home page'); with res.send('Post DAG page'); and res.send('Search DAG page'); as appropriate.
Add routes code to the app.js file as follows:
// routes
const home = require('../routes/home');
const postDAG = require('../routes/postDAG');
const searchDAG = require('../routes/searchDAG');

app.use('/', home);
app.use('/home', home);
app.use('/postDAG', postDAG);
app.use('/searchDAG', searchDAG);
Test it by opening a browser and typing http://localhost:3000/ as the URL. You should see the Home Page message displayed in the browser. The same message should show when typing http://localhost:3000/home
Repeat test by typing http://localhost:3000/postDAG to see Post DAG Page message and http://localhost:3000/searchDAG to see Search DAG Page message.
The next step is to use the Pug Templating Engine to assist with Front End development. Pug Template Engine uses static template files defined as part of the application. At runtime, the template engine replaces variables in a template file with actual values and transforms the template into an HTML file sent to the client.
We also will be using CSS from Bootstrap, which we will be dynamically acquiring at run time.
Install Pug saving it as a dependency, by typing the following command:
npm i --save pug
Create views folder under your application folder and add layout.pug file under it.
Add the following code to the layout.pug file:
doctype html
html
  head
    title= `${title}`
    link(rel='stylesheet', href='https://maxcdn.bootstrapcdn.com/bootstrap/4.3.1/css/bootstrap.min.css')

  body
    header.navbar.bg-info.text-light
      h1 My Application

    include menu.pug

    div.container-fluid
      block content
Add a menu.pug template file into the views folder and add the following code to it:
header.bg-light
  block menu
    ul.nav.nav-tabs
      li.nav-item
        a.nav-link.text-dark(href=".")="Home"
      li.nav-item
        a.nav-link.text-dark(href="postDAG")= "Post to DAG"
      li.nav-item
        a.nav-link.text-dark(href="searchDAG")= "Search DAG"
Add an index.pug template into the views folder and add the following code to it:
extends layout

block content
  h2 Welcome!
  p Some text...
Repeat this process to add postDAG.pug and searchDAG.pug templates into the views folder, replacing:
h2 Welcome!
with:
h2 Post to DAG
and:
h2 Search DAG
respectively.
Your directory structure should look like the following:
myObyteApp
  routes
    home.js
    postDAG.js
    searchDAG.js
  startup
    app.js
  views
    index.pug
    layout.pug
    menu.pug
    postDAG.pug
    searchDAG.pug
  index.js
  package.json
Import Node's native Path module, by adding the following code to the app.js file:
const path = require('path');This module will be used to build the path to your views folder.
Configure app.js to use Pug as a layout engine and to look for templates inside the views folder by adding the following commands after app.use('/', home); line:
app.set('../views', path.join(__dirname, 'views'));
app.set('view engine', 'pug');
Your app.js file should look like following:
const express = require('express');
const app = express();
const path = require('path');

// routes
const home = require('../routes/home');
const postDAG = require('../routes/postDAG');
const searchDAG = require('../routes/searchDAG');

app.set('../views', path.join(__dirname, 'views'));
app.set('view engine', 'pug');

app.use('/', home);
app.use('/home', home);
app.use('/postDAG', postDAG);
app.use('/searchDAG', searchDAG);

module.exports = app;Finally, modify all files in the routes folder replacing res.send command with res.render command as follows:
Replace res.send('Home page'); with res.render('index', { title: 'Home page' }); in the home.js file.
Replace res.send('Post DAG page'); with res.render('postDAG', { title: 'Post to DAG page' }); in the postDAG.js file.
Replace res.send('Search DAG page'); with res.render('searchDAG', { title: 'Search DAG page' }); in the searchDAG.js file.
Restart server from the command window by typing nodemon
Test the application in a browser.
Extend postDAG.pug template as following:
extends layout

block content
  <script src="https://ajax.googleapis.com/ajax/libs/jquery/3.4.0/jquery.min.js"></script>
  <script src="https://maxcdn.bootstrapcdn.com/bootstrap/4.3.1/js/bootstrap.min.js"></script>

  h2 Post to DAG
  p.
    Use Data option on this page to post arbitrary key-value pairs into
    Obyte network.
    Use Data Feed option on this page to post values into datafeeds
    as an oracle.

  // JavaScript section

  // Form section
  form(method='POST' action='/postDAG')

    div.form-group
      div.form-row
        div.col-md-2
          label(for='type') Type:
          select.form-control(
            id='type'
            name='type'
            onchange='typeChange()'
            required
          )
            option(value='') What to post?
            option(value='bytes') Bytes
            option(value='data') Data
            option(value='data_feed') Data Feed
        div.col-md-7
          label(for='wif') WIF of wallet to be used to fund the transaction
          input.form-control(
            id='wif'
            name='wif'
            placeholder='WIF'
            required
          )

    div(id='paymentDiv')
    div(id='dataDiv')

    div.form-group
        button.btn.btn-primary(type='submit') Post to DAG

    div(id='errorDiv')

  // Result Section
In the above template we have used standard Bootstrap 4 css classes, e.g.: form-group form-row col-md-2 col-md-4 form-control btn btn-primary.
You should see the basic data entry form in the browser. However, at this stage payment and data sections of the form are missing and none of the buttons is working yet.
Create a javascripts directory under the views folder. And add to it the following files: js_changeType.pug, js_paymentDiv.pug, js_dataDiv.pug, js_dataRows.pug and js_dataName.pug.
Add the following code to the js_changeType.pug file:
// Javascript for dynamic creation of the data entry form
script.

  var rowId = 1, type, placeholder, error='';

  function typeChange() {
    type = document.getElementById("type").value;

    // remove all subforms
    var elements = document.getElementsByClassName("subform");
    var count=0, element;

    for (var i = 0; i < elements.length; i++) {
      element = elements[i];
      element.parentNode.removeChild(element);
      count++;
    }

    // remove results
    var resultElement = document.getElementById('result');
    if (resultElement) resultElement.parentNode.removeChild(resultElement);

    // remove errors
    var errElement = document.getElementById('error');
    if (errElement) errElement.parentNode.removeChild(errElement);

    // add payment subform
    if (type === 'bytes') {
      paymentDiv();
    }
    // add data subform
    if (type === 'data' || type === 'data_feed') {
      if (type === 'data') placeholder = 'Field';
      if (type === 'data_feed') placeholder = 'Data Feed Name';
      dataDiv();
    }
}Add the following code to the js_paymentDiv.pug file:
// Javascript for dynamic creation of the Payments section of the Form
script.
  function paymentDiv() {
    var element = document.createElement('div');
    var innerHTML =
      `<div class='form-group subform' id='payment'>
        <h5> Payment details</h5>
        <div class='form-row'>
          <div class='col-md-4'>
            <label for='amount'>Amount</label>
            <input
              class='form-control'
              id='amount'
              name='amount'
              placeholder='Bytes'>
          </div>
          <div class='col-md-7'>
            <label for='recipient'>Recipient's wallet address</label>
            <input
              class='form-control'
              id='recipient'
              name='recipient'
              placeholder='Address'>
          </div>
        </div>
      </div>`;

    element.innerHTML = innerHTML;
    document.getElementById("paymentDiv").appendChild(element);
}Add the following code to the js_dataDiv.pug file:
// Javascript for dynamic creation of the Data section of the Form
script.
  function dataDiv() {
    // dynamically create Data section of the Form
    //alert('inside dataDiv function');
    var element = document.createElement('div');
    var innerHTML =
      `<div class='form-group subform' id='data'>
        <div class='form-group'>
          <h5> Values Dynamic</h5>
          <div class='form-row' id='1'>
            <div class='col-md-4'>
              <input
                class='form-control field1'
                id='field-1'
                placeholder='${placeholder}'
                onchange='setName(id)'>
            </div>
            <div class='col-md-7'>
              <input
                class='form-control'
                id='value-1'
                placeholder='Value'>
            </div>
          </div>
        </div>
        <div id='newRows'></div>
        <div class='form-group'>
          <button type='button' onclick='addRow()'>+</button>
        </div>
      </div>`;

    element.innerHTML = innerHTML;
    document.getElementById("dataDiv").appendChild(element);
}Add the following code to the js_dataRows.pug file:
// Javascript to add/remove rows from the Data section of the Form
script.
  function addRow() {
    rowId++;
    var fieldId = 'field-' + rowId;
    var valueId = 'value-' + rowId;
    var buttonId = 'button-' + rowId;
    var element = document.createElement('div');
    element.id = rowId;

    var innerHTML =
      `<div class='form-group'>
        <div class='form-row'>
          <div class='col-md-4'>
            <input type='text'
              id=${fieldId}
              class='form-control field1'
              placeholder='${placeholder}'
              onchange='setName(id)'>
          </div>
          <div class='col-md-7'>
            <input type='text'
              id=${valueId}
              class='form-control'
              placeholder='Value'>
          </div>
          <div class='col-md-1'>
            <button type="button"
              id=${buttonId}
              onclick='removeRow( ${rowId} )'>-</button>
          </div>
        </div>
      </div>`;

    element.innerHTML = innerHTML;
    document.getElementById("newRows").appendChild(element);
    //getPlaceholder();
  }

  function removeRow(rowId) {
    // Removes an element from the document
    var element = document.getElementById(rowId);
    element.parentNode.removeChild(element);
}Add the following code to the js_dataName.pug file:
// Javascript to set name property of the data field and check for uniqueness
script.
  function setName(id) {
    // get the value of the 1st field in the row
    var name = document.getElementById(id).value;

    // check that the value of the 1st field is unique
    uniqueName(id, name);

    // set name attribute of the 2nd field in the row to the value of 1st field
    var element = document.getElementById('value-'+id.substr(6));
    element.setAttribute('name', name);
  }

  function uniqueName(id, name) {
    // validate that the data in 'field'/'data feed' is unique
    var elements = document.getElementsByClassName('field1');
    var count=0;

    for (var i = 0; i < elements.length; i++) {
      if (name === elements[i].value) count++
    }

    if (count > 1) {
      var message = placeholder + ' has to be unique.'
      showError(message);
      // if 1st row is removed, remove delete button from the next row
      if (id.substr(6) === '1') {
        var buttonId = 'button-' + elements[1].id.substr(6);
        var elementButton = document.getElementById(buttonId);
        elementButton.parentNode.removeChild(elementButton);
      }
      // remove row
      removeRow(id.substr(6));
    }
  }

  function showError(message) {
    // dynamically display error
    var element = document.createElement('div');
    var innerHTML =
      `<div class='form-group' id='error'>
        <div class='alert alert-danger alert-dismissible' id='error'>
          <a class='close' href='#' data-dismiss='alert'>×</a>
          <strong>Error:</strong>
          <span>${message}</span>
      </div>`;

    element.innerHTML = innerHTML;
    document.getElementById("errorDiv").appendChild(element);
  }
Add the following code to the // JavaScript section of the postDAG.pug template. Keep indentation the same as following:
// JavaScript section
include javascripts/js_changeType.pug
include javascripts/js_paymentDiv.pug
include javascripts/js_dataDiv.pug
include javascripts/js_dataRows.pug
include javascripts/js_dataName.pug
Test the form by selecting different Type values. Test adding and removing rows in the data section.
Add router.post section after the router.get section of the routes/postDAG.js file containing a placeholder for future Obyte integration as follows:
router.post('/', (req, res) => {
  // preparing transaction data
  // posting obyte payment & displaying results
  // posting obyte data & displaying results
  // posting obyte data feed & displaying results
  // testing post router
  console.log(req.body);
  res.send('Posted to DAG');
})
Test Submit by clicking the Post to DAG button. This should display 'Posted to DAG' message in your browser. You would not be able to see submitted data on your console just yet though.
Install a package named body-parser, which will make it easier to access the form data:
npm install --save body-parser
Then add following code to your startup/app.js file:
const bodyParser = require('body-parser');
...
app.use(bodyParser.urlencoded({ extended: true }));
Place app.use(bodyParser.urlencoded({ extended: true })); line before app.use('/', home); line.
Test your application and check the console to see your data posted to the server.
You should see something like this displayed on the console: { type: 'data', wid: 'wid123test', 'myField 1': 'myValue 1', myField2: 'myValue 2', 'myField 3': 'myValue 3' }
Posting data or transactions to the Obyte network require payment in Bytes. In a real-life application, this can be done by the users of your application from their wallets.
However, in this tutorial, you will have to fund the transactions yourself from your own Obyte wallet.
Instructions on creating Obyte testnet GUI wallet can be found at https://obyte.org/testnet.html. Download the version for your operating system and install it selecting the option for generating the desktop icon.
For the purposes of this tutorial, we will refer to this wallet as your GUI wallet.
Fund your Obyte testnet GUI wallet by clicking on the link on the https://obyte.org/testnet.html page. You will need to wait 10-15 minutes for the transaction to be confirmed.
Next, you need to create another wallet to work with your application. This wallet will be used to fund saving data and sending payments.
For the purposes of this tutorial, we will refer to it as the Obyte js Wallet.
Click on the link below and select Testnet Env option, then click the Generate new random wallet button.
This creates your js wallet. Note the js wallet's details shown.
The generated WIF will be used for Obyte js integration and the address will be used for funding. When working with testnet, you can save this in the obyte/TestWalletInfo.txt file. However, when working with live wallets, make sure to keep this data private, as anyone with access to this data would be able to control funds in your wallet!
Fund your new js wallet by sending Bytes to its address from your GUI wallet. Make sure you send enough Bytes to use for testing. 20,000 or more.
Check that everything worked by going to the Testnet DAG explorer to view public transactions and searching using your js wallet's address.
Install Obyte libraries by running following command in the terminal window:
npm i obyte --save
I have got a whole bunch of errors re secp256k1, and I could not figure out how to resolve it. However, this does not seems to have any impact on what I am trying to do here.
Create obyte.js file in the startup directory containing the following code:
const obyte = require('obyte');

// connect to obyte testnet
const options = { testnet: true };
const client = new obyte.Client('wss://obyte.org/bb-test', options);

// To keep the connection with the WebSocket node alive you need to notify the node that your peer is awake every 10 sec.
setInterval(function() {
  client.api.heartbeat()
}, 10 * 1000);

module.exports = client;
We are running this demo against Obyte testnet. When you are ready to connect to live Obyte network, replace // connect to obyte testnet with the following code:
// connect to mainnet official node wss://obyte.org/bb
const client = new obyte.Client();
Then, add the following code to the top section of the routers/postDAG.js file.
const client = require('../startup/obyte');
We are going to modify router.post section of the routers/postDAG.js file.
Add the following code to the // preparing transaction data subsection:
// preparing transaction data
const type = req.body.type;
const wif = req.body.wif;

if (type === 'bytes') {
  var params = {
    outputs: [ {
      address: req.body.recipient,  // The Obyte address of the recipient
      amount: Number(req.body.amount) } ] };// The amount she/he receives
}

if (type === 'data' || type === 'data_feed') {
  var params = req.body;
  delete params.type;
  delete params.wif;
}Add the following code to the // posting obyte payment & displaying results subsection:
// posting obyte payment & displaying results
if (type === 'bytes') {
  client.post.payment(params, wif, function(err, result) {
    res.render('postDAG', { title: 'Data Transaction is Posted to DAG', err, result });
  });
}Add the following code to the // posting obyte data & displaying results subsection:
// posting obyte data & displaying results
if (type === 'data') {
  client.post.data(params, wif, function(err, result) {
    res.render('postDAG', { title: 'Data is Posted to DAG', err, result });
  });
}Add the following code to the // posting obyte data feed & displaying results subsection:
// posting obyte data feed & displaying results
if (type === 'data_feed') {
  client.post.data(params, wif, function(err, result) {
    res.render('postDAG', { title: 'Data Feed is Posted to DAG', err, result });
  });
}And finally, comment out // testing post router subsection.
Add the following code to the // Results Section of the views/postDAG.pug file:
// Result Section
br
if result
  div.alert.alert-success.alert-dismissible(id='result')
    a.close( href='#' data-dismiss='alert' ) ×
    h4 Transaction posted !
    p Unit hash:
      span=  result
    hr
    a.alert-link( href="https://testnetexplorer.obyte.org/#"+result target="testnet" )
      span See it on the DAG.
if err
  div.alert.alert-danger.alert-dismissible(id='error')
    a.close( href='#' data-dismiss='alert' ) ×
    strong Error:
    span  data can not be saved !
    span= err
Test posting Obyte payments, data and data feed transactions. Click on the link in the results section of your page to view your transaction on the Obyte network.
You have to have GIT installed on your machine.
Update "scripts" section of the package.json file to contain the following:
"scripts": {
  "test": "echo \"Error: no test specified\" && exit 1",
  "start": "node index.js"
},In command prompt window, go to your project directory, and type git init
This will initialise your git repository. And you will get Initialized empty Git repository... message back. Check the status by typing git status at any time.
Create .gitignore file in your project directory. Use this file to specify files and/or directories you do not want to publish. For example, to exclude myNotes.txt file and /myNotes folder add the following lines to the .gitignore file:
myNotes.txt
/myNotes
Type git add . at the command prompt window in the root of your project directory. This will take some time and you will see a lot of warnings like warning: LF will be replaced by CRLF in package.json, which you can ignore. Type git status to check status.
Type git commit -m "1st commit from local" at the command prompt in the root of your project directory. This will commit all your changes. Type git status to check git status.
Sign up with Heroku for one of their free hosting packages.
Login to your new Heroku account in the browser.
Please follow Getting Started on Heroku with Node.js guide at https://devcenter.heroku.com/articles/getting-started-with-nodejs#set-up and install the Heroku Command Line Interface (CLI).
In command prompt go to your project directory and type heroku login Then create new Heroku project by typing heroku create myProject
This will create Heroku project and provide you with url.
In command prompt type git push heroku master
It is a good practice to keep your source on Github. Sign up for a free account using your email address, then login.
Create a new Github repository by clicking on the New button. Github will ask you for a repository name. After repository is generated, Github will provide you with commands for pushing your local code to the new repository.
In command prompt go to your project directory and execute'git remote add origin
Next push your locally stored code into the new repository git push -u origin master
Anytime you make changes to your application remember to update your Github repostiory and deploy to Heroku. Simply go to your project folder in command prompt and type following commands:
git add .
git commit -m "another commit"
git push -u origin master
git push heroku master
This tutorial is coming soon.